Taking Outlook to Task

Outlook Tasks – what are they all about? Why not just whack everything in the Calendar and have done with it?
Well, if your Calendar is heaving, and you just now and again find yourself ‘dropping the ball’ when it comes to getting things done, maybe it’s time to take a closer look at Outlook Tasks.
Tip 1: Check Out the Daily Task List View
If you only read one tip about Outlook Tasks, read this one. It could convert you…
Image 1: Viewing Tasks in Outlook Calendar
The screenshot below is from a user who has enabled the Daily Task View in their Outlook Calendar. Notice that the Calendar contains nothing task related, only meetings, appointments and events.
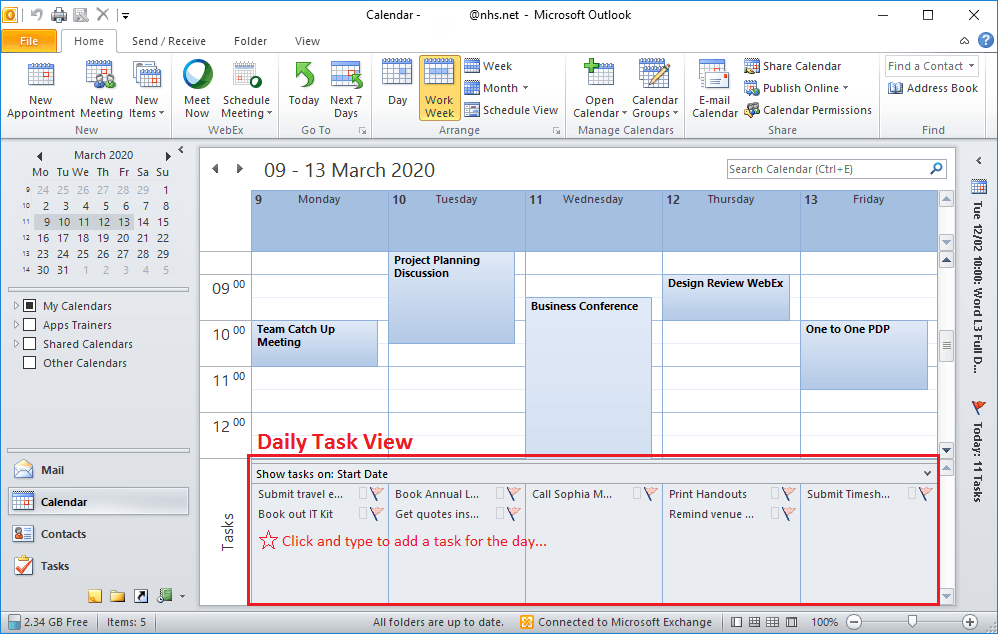
To give this a try, complete these steps;
- Open Calendar View in Outlook
- Select Home > Arrange > Work Week
- Select View > Layout > Daily Task List
Tip 2: Assign a Category to a Task
Outlook Categories are very useful for sorting, filtering or finding Tasks. This could be by Project Name, Customer, CCG, Meetings etc.
Image 2: Outlook Catagories are Great for Organising Tasks
Notice the prefix used on some catagories in the image below. These can be used exclusively for organising Tasks.
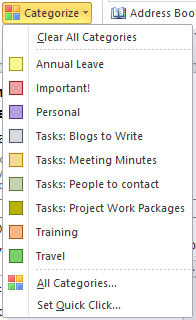
To create an Outlook Category;
- Select an Outlook Task in Task View
- Select Home > Tags > Categorise > All Categories…
- All available Catagories are displayed. Click New…
- Add a Name, choose a Colour, a Keyboard Shortcut if required and click OK
- TIP: Prefix them with text e.g. “Tasks:” to identify Task Catagories
- There’s a max. of 25 colours available, but a limit of approx. 500 catagories.
To arrange Outlook Tasks by Categories;
- In Task View, right click on any grey column header and select Arrange By > Categories
Image 3: Arrange Tasks by Catagories
In the screenshot below, see how even large lists of Tasks can be managed by assigning catagories to them.

Tip 3: Assign (Delegate) a Task
In addition to creating your own tasks, you can create tasks to assign to others. From Outlook Task view;
- Home > New > New Items > Task Request
- Add name/email address of the person in the To: field
- Complete the Subject, Due Date, Status
- Select or clear the Keep an updated copy of this task on my task list check box and the Send me a status report when this task is complete check box.
- Click Send
The person assigned can decline the task, accept the task, or assign the task to someone else. If the task is declined, it is returned to you.
Tip 4: Link an Outlook Task to a OneNote Page & Easily Locate it
Link an Outlook Task to a page within a OneNote section.
- Open Task View in Outlook, select a Task from your Task List and click Home > Actions > OneNote
- From the Select Location pop up window, select a Page in which to put the Task and click OK
- OneNote launches, the Page is displayed with the addition of the Task Subject along with a flag at the end of the Page’s contents.
This OneNote Page can easily be found at any time by opening the Outlook Task and selecting Task > Actions > OneNote. OneNote launches and opens the linked Page.
Tip 5: Keyboard Shortcuts
Speed up changing view from Mail to Calendar, Contacts, Tasks etc. using these intuitive shortcuts;
- CTRL + 1 = Mail view
- CTRL + 2 = Calendar View
- CTRL + 3 = Contacts
- CTRL + 4 = Tasks
- CTRL + 5 = Notes
These views can also be displayed by clicking on the icons in the Navigation Pane.
Tip 6: Create an Outlook Task from a OneNote Page & Easily Locate it
- Open a page in OneNote where an Outlook Task will be created
- Select Home > Outlook > Outlook Tasks > Select a Flag (Today, Tomorrow etc.)
- A Flag is added to the Page Title, or the last cursor location
To easily open the Outlook Task from OneNote;
- Open the page in OneNote containing a Task
- Select Home > Outlook > Outlook Tasks > Open Task in Outlook
- The Task opens in its own Outlook window
Tip 7: Use Template Tasks
Some users create an Outlook Task that is never deleted, just copied and pasted as needed. Ideal for Tasks that need to contain specific details such as a hyperlink to a shared folder e.g. relevant meeting minutes:
- Create an Outlook Task with a subject prefixed with “Task Template:” or similar
- In the Task Body, enter plain text info, such as a hyperlink to a shared folder
- When a task is required with these details, copy and paste the template task in Task view
Tip 8: Add Custom Column Data in a Task
Some users enter free text into rarely used fields so it can be displayed and sorted in Task columns.
- Select or open an Outlook Task
- Select Task > Details
- Enter free text in either the Mileage, Billing Information or Company
Image 4: Using the Details Fields in Tasks to Show Free Text in Task View
The screenshot below shows little used fields available for adding Task information. Some use these as a hack for adding any kind of free-text which can be sorted and arranged.
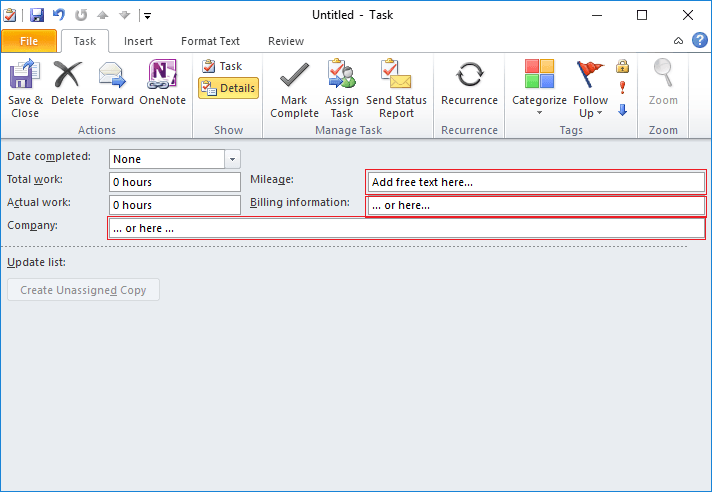
To arrange Tasks by any of these fields and hence view your free text in the Task List view;
- In Task View, right click on any grey column header and select Arrange By > Mileage, Billing Information or Company
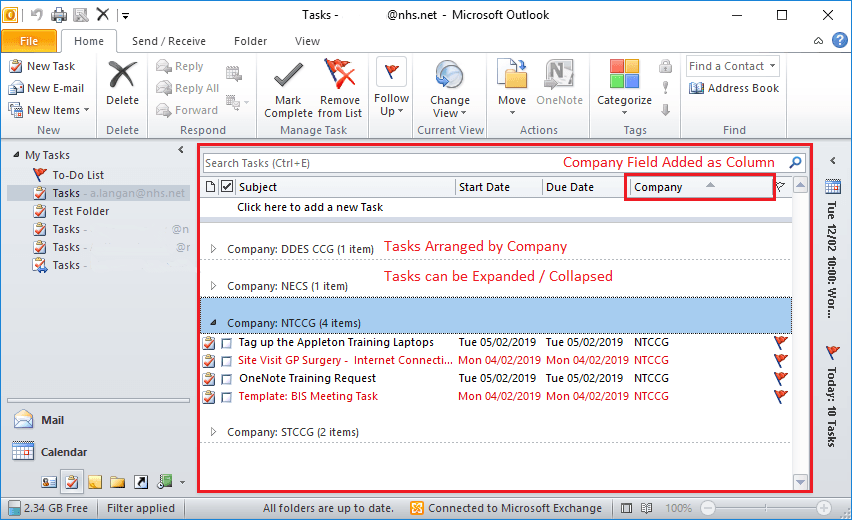
Tasks are arranged by the selected field as in the image below.
Image 5: Arranging Tasks by Details Fields to Sort Long Lists of Tasks
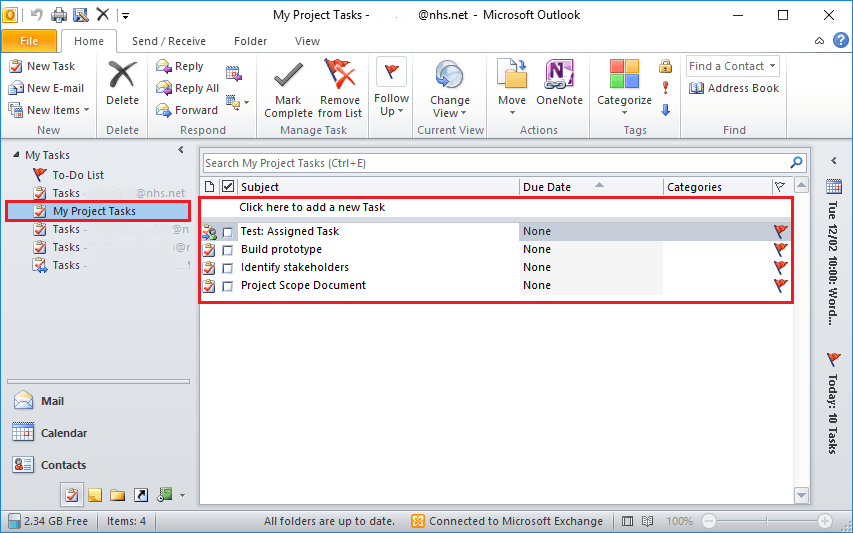
Tip 9: Use Task Folders
In addition to the default Task folder, additional folders can be created. Some like these to keep Tasks separate, e.g. for a specific project. The screenshot below shows an example where a task folder has been created named “My Project Tasks;”
Image 6: Break Up Long Lists of Tasks by Creating Task Folders
To create a new Task Folder;
- In Task view, right click on the default Task folder on the right Navigation pane and select New Folder…
- Enter a name, select where to place the folder and click OK
Unlike default Task folders, new ones can be renamed and deleted.
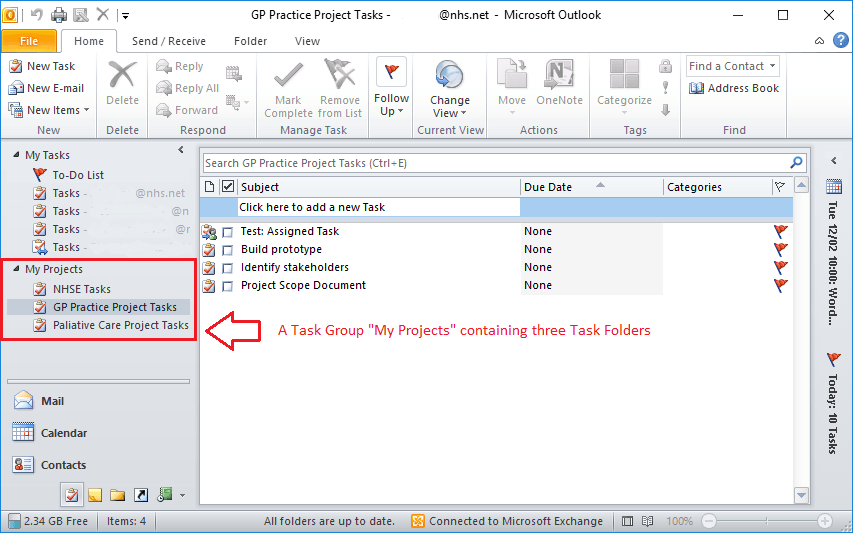
Tip 10: Tidy up Task Folders with Task Groups
Some users really go to town and create many Task Folders. To keep things tidy and manageable, use Task Groups. The screenshot below shows a Task Group containing several Task Folders;
Image 7: Organise Task Folders in Task Groups
To create a Task Group;
- In Outlook Task View, on the left side Navigation Pane, right click on My Tasks and select New Folder Group
- The Group will appear in the Navigation Pane with the cursor showing, type a name and press Enter
- Click and drag any Task Folders into the new Task Group
Conclusion
If it’s a Task, don’t add it to the Calendar or email it to yourself – create a Task. Why not try these tips, or even just tip number 1 for one working week? If you have success with Tasks, please let us know and we may feature it on the site. NECSU.learning@nhs.net
Happy Tasking everyone!